#4 WebAssembly and C++: What's WASI and why do we need it?
This post is part of a WebAssembly series focused on WASM and C++. The goal is to gain a thorough understanding of how WebAssembly works, how to use it as a compilation target for C++ code and hopefully have fun along the way. So, stick with me for this exciting journey.
Recap
So far, in this series, we’ve learned what WASM is, how to execute it in JavaScript engines (like browsers or node.js) and how to perform basic interoperability between WASM code and JavaScript.
The C++ code used to generate WASM modules was independent of any libraries (that includes standard C/C++ libraries).
Now, it’s finally time to discuss the usage of standard library.
What’s WASI?
In short, WASI defines the ABI for WASM in order to standardise the integration with programming languages like C++ or Rust. This is in details described on WASI’s page. WASI documents is a good starting point.
This may sound a bit vague to begin with but bear with me, it’s gonna get a lot clearer once we get to some examples.
Prerequisites
Before we continue, some tools are required.
WASI SDK
clang (at least at the time this post is being written) supports WASM target but it knows nothing about WASI. Thankfully WASI provides an SDK which integrates clang (and some other basic development tools) that can be used to build WASM code with WASI supports.
There are 3 options described in wasi-sdk readme. You can build the SDK yourself, use a release package or a provided docker image. I like to use the release packages.
|
|
And just like that, the SDK should be installed in /opt.
|
|
Additionally, it’s a good idea to create an environment file containing the following entries.
|
|
Save that as wasmenv.sh. This could be placed in your .bashrc as well but
I like to keep my environment clean and only extend it with stuff that is
required for a given project.
Using the docker image has a lot of advantages as well.
|
|
The container comes with a complete environment preconfigured. This is very convenient. Additionally, it’s just easier to update the SDK by just updating the image.
It doesn’t really matter how you plan to use the SDK as long as you have it available and working.
WASM runtime
For test purposes we’ll need a runtime. Something like wasmtime is a good choice. I’m using my distro’s (Arch) package manager (pacman) to install it.
WASI hello world
Some code is needed to start our journey. Here’s the basic “hello world” in C++ with no surprises.
|
|
Let’s source the environment file which I’ve prepared earlier and try to build the code.
|
|
Just like that, we’ve built our first WASM module from C++ code that is using C++’s standard library.
Running this in WASM runtime is trivial.
|
|
It works! Now, how to run it in the browser?
WASI in browsers
Let’s start with the same boilerplate code I’ve already used several times.
|
|
|
|
WASI ABI
Here’s where stuff starts to get interesting. What is the entry point to our
program? Is it main? Can this be customised? Thankfully, this is all
documented within WASI documents, specifically the WASI Application
ABI.
This document defines two types of modules:
- command modules
- reactors
Executables definitely fall under the command modules category and things
like static libraries would be reactors in my understanding (spoiler alert,
WASM does not support dynamic shared libraries).
Since our example code is a command module it must be exporting the _start
function and after inspecting the binary, it definitely does.
|
|
Good! Let’s call it from JavaScript and see what’ll happen.
|
|
So, after running python’s simple http server and opening index.html… it
kind of… doesn’t work. Complaining about wasi_snapshot_preview1 object.

That rings a bell, most likely it needs some functions in the environment. How to determine which? Let’s examine the module once again.
|
|
That’s a lot of functions for such a simple code but nothing out of ordinary.
It needs functions to determine the environment and argc, argv passed to
the program. Additionally it needs simple file descriptor IO - again, expected
as it writes to STDOUT (or its equivalent). The last thing is proc_exit to
set the return status.
Yeah but do we have to implement all of that just to run any basic code? Short answer is no! There are polyfills. Those are JavaScript libraries implementing all of that for us but for the sake of learning it’s good to know what has to be done to bootstrap all of that yourself!
Once again, WASI documentation to the rescue. The code complains about
wasi_snapshot_preview1 object and this is in line with the current unstable
implementation of WASI ABI which is even confirmed
here and
here. After
defining wasi_snapshot_preview1 within the import object:
|
|
We see a new complaint:

It looks for all the missing imports starting with args_get so, we’re on the
right track. The signatures for all of the required functions are well described
in WASI ABI documentation for
preview. args_get is documented
here.
It’s all cool but this seems to be rust signature and I’m not that familiar
with rust so, is there a better way to figure out what has to be implemented?
We can deduce all the details using JavaScript itself. Normal JavaScript
functions (non arrow functions) have arguments object that can be inspected.
Let’s do that.
|
|
That’s a complete set of all required functions. You might have noticed that
I’ve placed throw "abort" in fd_write - this is just a temporary measure.
Since the code is incomplete and comprised of stubs only, it’s required to short
circuit an infinite attempt to call fd_write.
Here’s the call history:

args_sizes_get
args_sizes_get is called first with two arguments the value of which
strangely resembles pointers to WASM memory.

This would match WASI documentation:
args_sizes_get() -> Result<(size, size), errno>
error: Result<(size, size), errno> Returns the number of arguments and the size of the argument string data, or an error.
The first variant is number of arguments and total length of arguments string
data. To implement that, let’s first create a fake args. This will simulate
what you’d normally provide in the shell command line when calling an
executable. Zeroth argument is always the executable itself so let’s do
something similar:
|
|
Okay. So now within args_sizes_get I need to write args.length into memory
address in wasm memory provided in first argument and the total string length
of all args concatenated into memory address provided in second argument.
The implementation should look something like so.
|
|
args_get
So far so good. Let’s proceed with the args_get. It too takes two pointers
as arguments.

The documentation is a bit cryptic:
args_get(argv: Pointer<Pointer<u8>>, argv_buf: Pointer<u8>) -> Result<(), errno>
Read command-line argument data. The size of the array should match that returned by args_sizes_get. Each argument is expected to be \0 terminated.
Honestly, I had to experiment a bit to understand what is expected to happen
here. This description in my opinion leaves a lot to be desired. Not knowing
rust and attempting to apply C++ logic here it seems that argv being **argv
would be an array of pointers and argv_buf is a pointer to a complete,
concatenated string of all args. The above logic can be implemented in
JavaScript the following way:
|
|
fd_fdstat_get
fd_fdstat_get is accepting two arguments as well.

The first one being the
file descriptor and the second one being a return value which is fdstat
record.
Now bear in mind that I just want to run my example code so majority of this
code is meant to serve only that purpose. With that in mind, I’m gonna
implement fd_fdstat_get to support only STDOUT and STDERR fds. Therefore I’m
gonna guard the code with this initial contract:
|
|
fdstat record is 24 byte long comprised of four fields. Assembling all of this
by hand is a bit tedious but can be done.
The first field is fs_filetype. Since I’m supporting output streams only,
I’m gonna hard code the character_device value.
Second field is fd_fdflags. This is a bit field. I’m just gonna write 0x1 to
that field indicating that data written to the fd is always appended. All
other flags are set to false.
Third one is another bit field with … a lot of fields. I’m gonna set it to
0x28 indicating that only sync and write operations are allowed on the
fd. I’m gonna write same value to the last field as well. Below is the
complete code for fd_fdstat_get.
|
|
fd_write
That leaves us with fd_write only. fd_write takes four argument.

I’m gonna have to fall back to WASI docs again since it’s a bit difficult to explain.
fd_write(fd: fd, iovs: ciovec_array) -> Result<size, errno> Write to a file descriptor. Note: This is similar to writev in POSIX.
Params: fd: fd, iovs: ciovec_array List of scatter/gather vectors from which to retrieve data.
Results: error: Result<size, errno>
First of all, Jesus… scather/gather… but nevermind. Right so, that’s 2
arguments but the code shows 4, why? Well, List is passed as two arguments:
pointer and its length and the last argument is a pointer for a return value
which is size - being the total amount of data written.
So, the signature will be:
|
|
So, we’ve got an array of ciovec and a single ciovec is a
record
containing:
- a pointer to a buffer of bytes
- buffer length
In other words, in order to implement fd_write I have to iterate over all
ciovecs and copy the data from the buffers they contain. I’m gonna copy all
that data to a string since I’m only supporting STDOUT and STDERR so, my
assumption is that I’m always operating on strings. Additionally, the total
length of the resulting string has to be written to a memory location provided
in size_p.
Here’s the code for fd_write:
|
|
Finally, with all of the above, we’ve got our “hello world”.

Testing args
We can test if the args_get and args_sizes_get works correctly, by extending the WASM module implementation
|
|
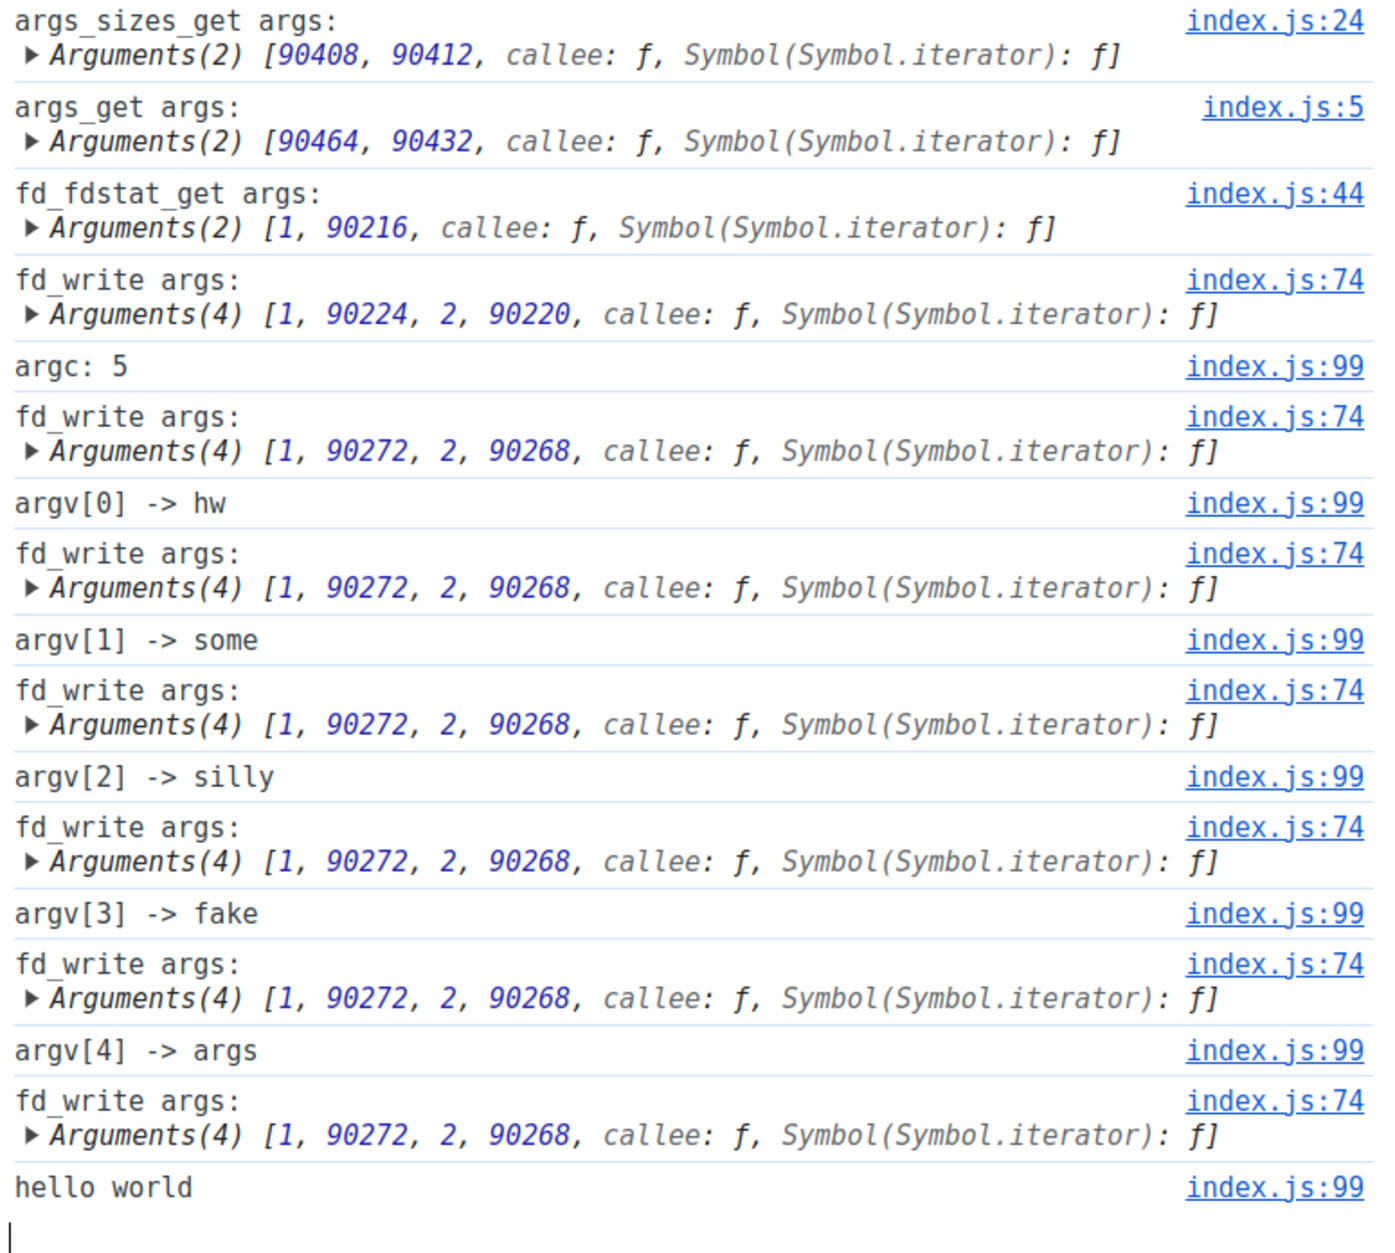
This produces the result

This is a bit obscured by all the debugging messages in the polyfills code but still proves that it works correctly.
WASI browser polyfills
All of that work has already been done. There’s a WASI polyfills repo that implements basic native interface as specified by WASI. Let’s initialise an empty npm project to experiment with them.
|
|
I’m gonna copy the example from from WASI polyfills repo repo with some small adjustments.
|
|
I like to use parcel as the bundler so, I’m gonna install it as development dependency:
|
|
I’ve deliberately explicitly imported the module for parcel to pick it up:
|
|
Preparing the application with parcel is very simple:
|
|
This will run http server on port 1234.
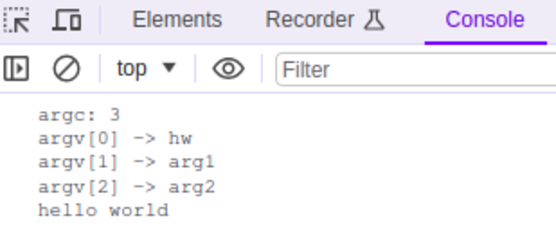
After running the WASM module with wasi.start I’m just inspecting the raw
contents of the File acting as STDOUT and print that to console. This works as
expected:

Conclusion
Today’s post thoroughly describes the intrinsics of working with WASM modules and how to interface with native code using WASI polyfills. Thanks to that knowledge we should have no problems interfacing with any native code and JavaScript!
As always all discussed code can be found in my gitlab repositories:
In the next instalment I’m gonna attempt to port a real piece of software to WASM and run it in the browser.